
getting the pieces together
This is the last week of my second sprint, and many dreams confronted themselves with reality. However, once I was able to pivot my massive ambitions into more feasible ones, the work is quite enjoyable and steady. This week I will have all the pieces together ready to be assembled in the next weeks.
INSPIRATION
A renewed inspiration towards Mayan embroidery came to me this week, as I'm preparing to meet some textile artisans to share traditional embroidery techniques. Also, I'm inspired by hearts (not new) and how they can be represented into geometric/organic manners, as well as massage mats. Quite eclectic, right?

OBJECTIVES & PLAN
The focus of this week is on design. Design of the smaller parts as well as design of the top.
- Making the MASSAGE CASES, where the vibration motors will be encased
- Design in Rhino the 3D model
- 3D print with Rostock printer
- Test if it works
- Iterate
- Design the TOP
- Finalize the 2D Rhino + Grasshopper model
- Laser Cut it
- Cut the other fabric
- Assemble
- Embroidery
- Meet the contacts for the Mayan embroidery
- Identify possiblities
- Schedule Workshop
MASSAGE CASES
INGREDIENTS
- Rhinoceros
- Zortrax M200 3D printer
- Black ABS
PROCEDURE
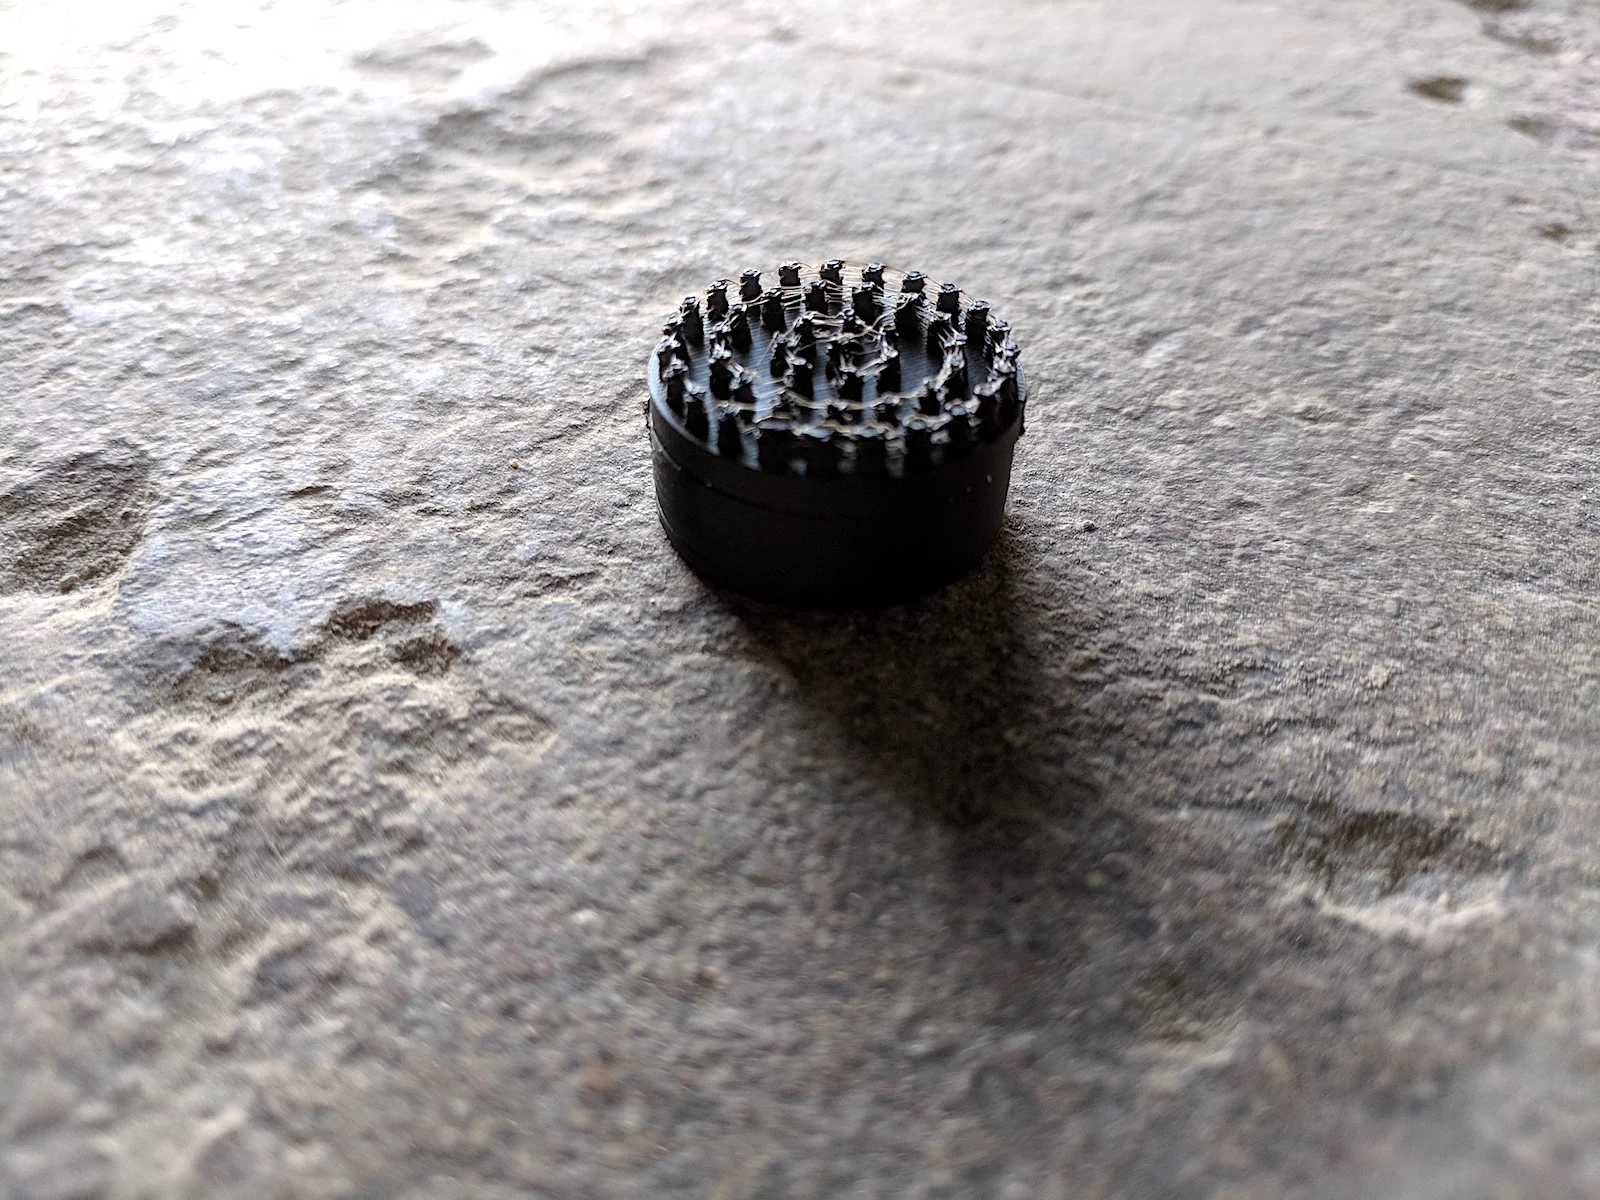
To make the massage cases, I first looked for inspiration online to see what other types of massage modules already existed. I found a few different things and saw that it would be a good idea to have little "teeth" making the massage more pleasurable on the skin. I sketched a few options for the disposition of the teeth (see image at top) and then went on Rhinoceros to create the 3D model for it.


My design decision was to make the massage cases cylindrical, so they could contain the Lilypad vibration motor perfectly. Also, because the cases are going to be sewn on a top that is tight on the body, it's ideal to avoid any sharp corner that would potentially hurt the skin.
In order to get the design right, I went through 3 iterations:
1. I first created a model with very small teeth - 1 mm diameter and 1.5 mm height, positioned in 4 concentric circles. The case was 21 mm in diameter and 11 mm height, including the case (9 mm) + lid (2 mm). When I printed it, the teeth were so small they didn't fully stick to the base, and easily broke. Also, the case was a bit too small and the motor inside didn't quite fit.
- Nozzle 200 degrees Celsius
- Bed 60 degrees Celsius
- Speed 100%
- Flow 100%
- 3D Print time: 20 min

3D print of the first iteration

First iteration ready with the base
2. I went back on Rhino and made the teeth bigger - 1.5 mm diameter and 3 mm height. I positioned them in 3 concentric circles. I made the case 22 mm diameter to ensure the motors would fit precisely inside. I created 6 holes on the base so that I could sew the massage box to the fabric. This time the teeth were a bit better, but still a bit too small. Some broke when trying to clean the residual ABS, so it was time to make them bigger. The holes on the base were hard to use, so I decided to add holes on the sides to enable an easier sewing.
- Nozzle 200 degrees Celsius
- Bed 60 degrees Celsius
- Speed 100%
- Flow 100%
- 3D Print time: 20 min
Second iteration of the massage case

Second iteration of the massage case + Lilypad vibration motor for fit testing
3. I went to Rhino again and made the teeth 2.5 mm diameter and 3 mm height. I positioned them in 3 concentric circles and made the case 22 mm diameter, since it worked really well. I made the case a bit shorter, 7 mm instead of 9 mm, so that the whole massage module would be less bulky. I also added 6 holes on the sides of the case, so I could better sew the case to the fabric of the top. This time the teeth were perfect, and didn't break. They were not too pointy so the massage they give is not painful.
- Nozzle 200 degrees Celsius
- Bed 60 degrees Celsius
- Speed 100%
- Flow 100%
- 3D Print time: 32 min

3D model of the 3rd iteration for the massage "teeth".


RESULTS & REFLECTIONS
The Zortrax worked very smoothly to make very solid and polished looking cases. By rapidly prototyping the boxes and trying to fit the vibration motor + sewing it to fabric, I could quickly assess the design changes needed to make the case fit precisely to the use it need to accomplish. The final case with teeth and lateral holes works quite well, however it's still a bit bulky to be sewn on a top.
TOP
INGREDIENTS
- Rhinoceros
- Grasshopper
- Fabric (black neoprene + cream lace + tulle )
- Laser Cutter
PROCEDURE
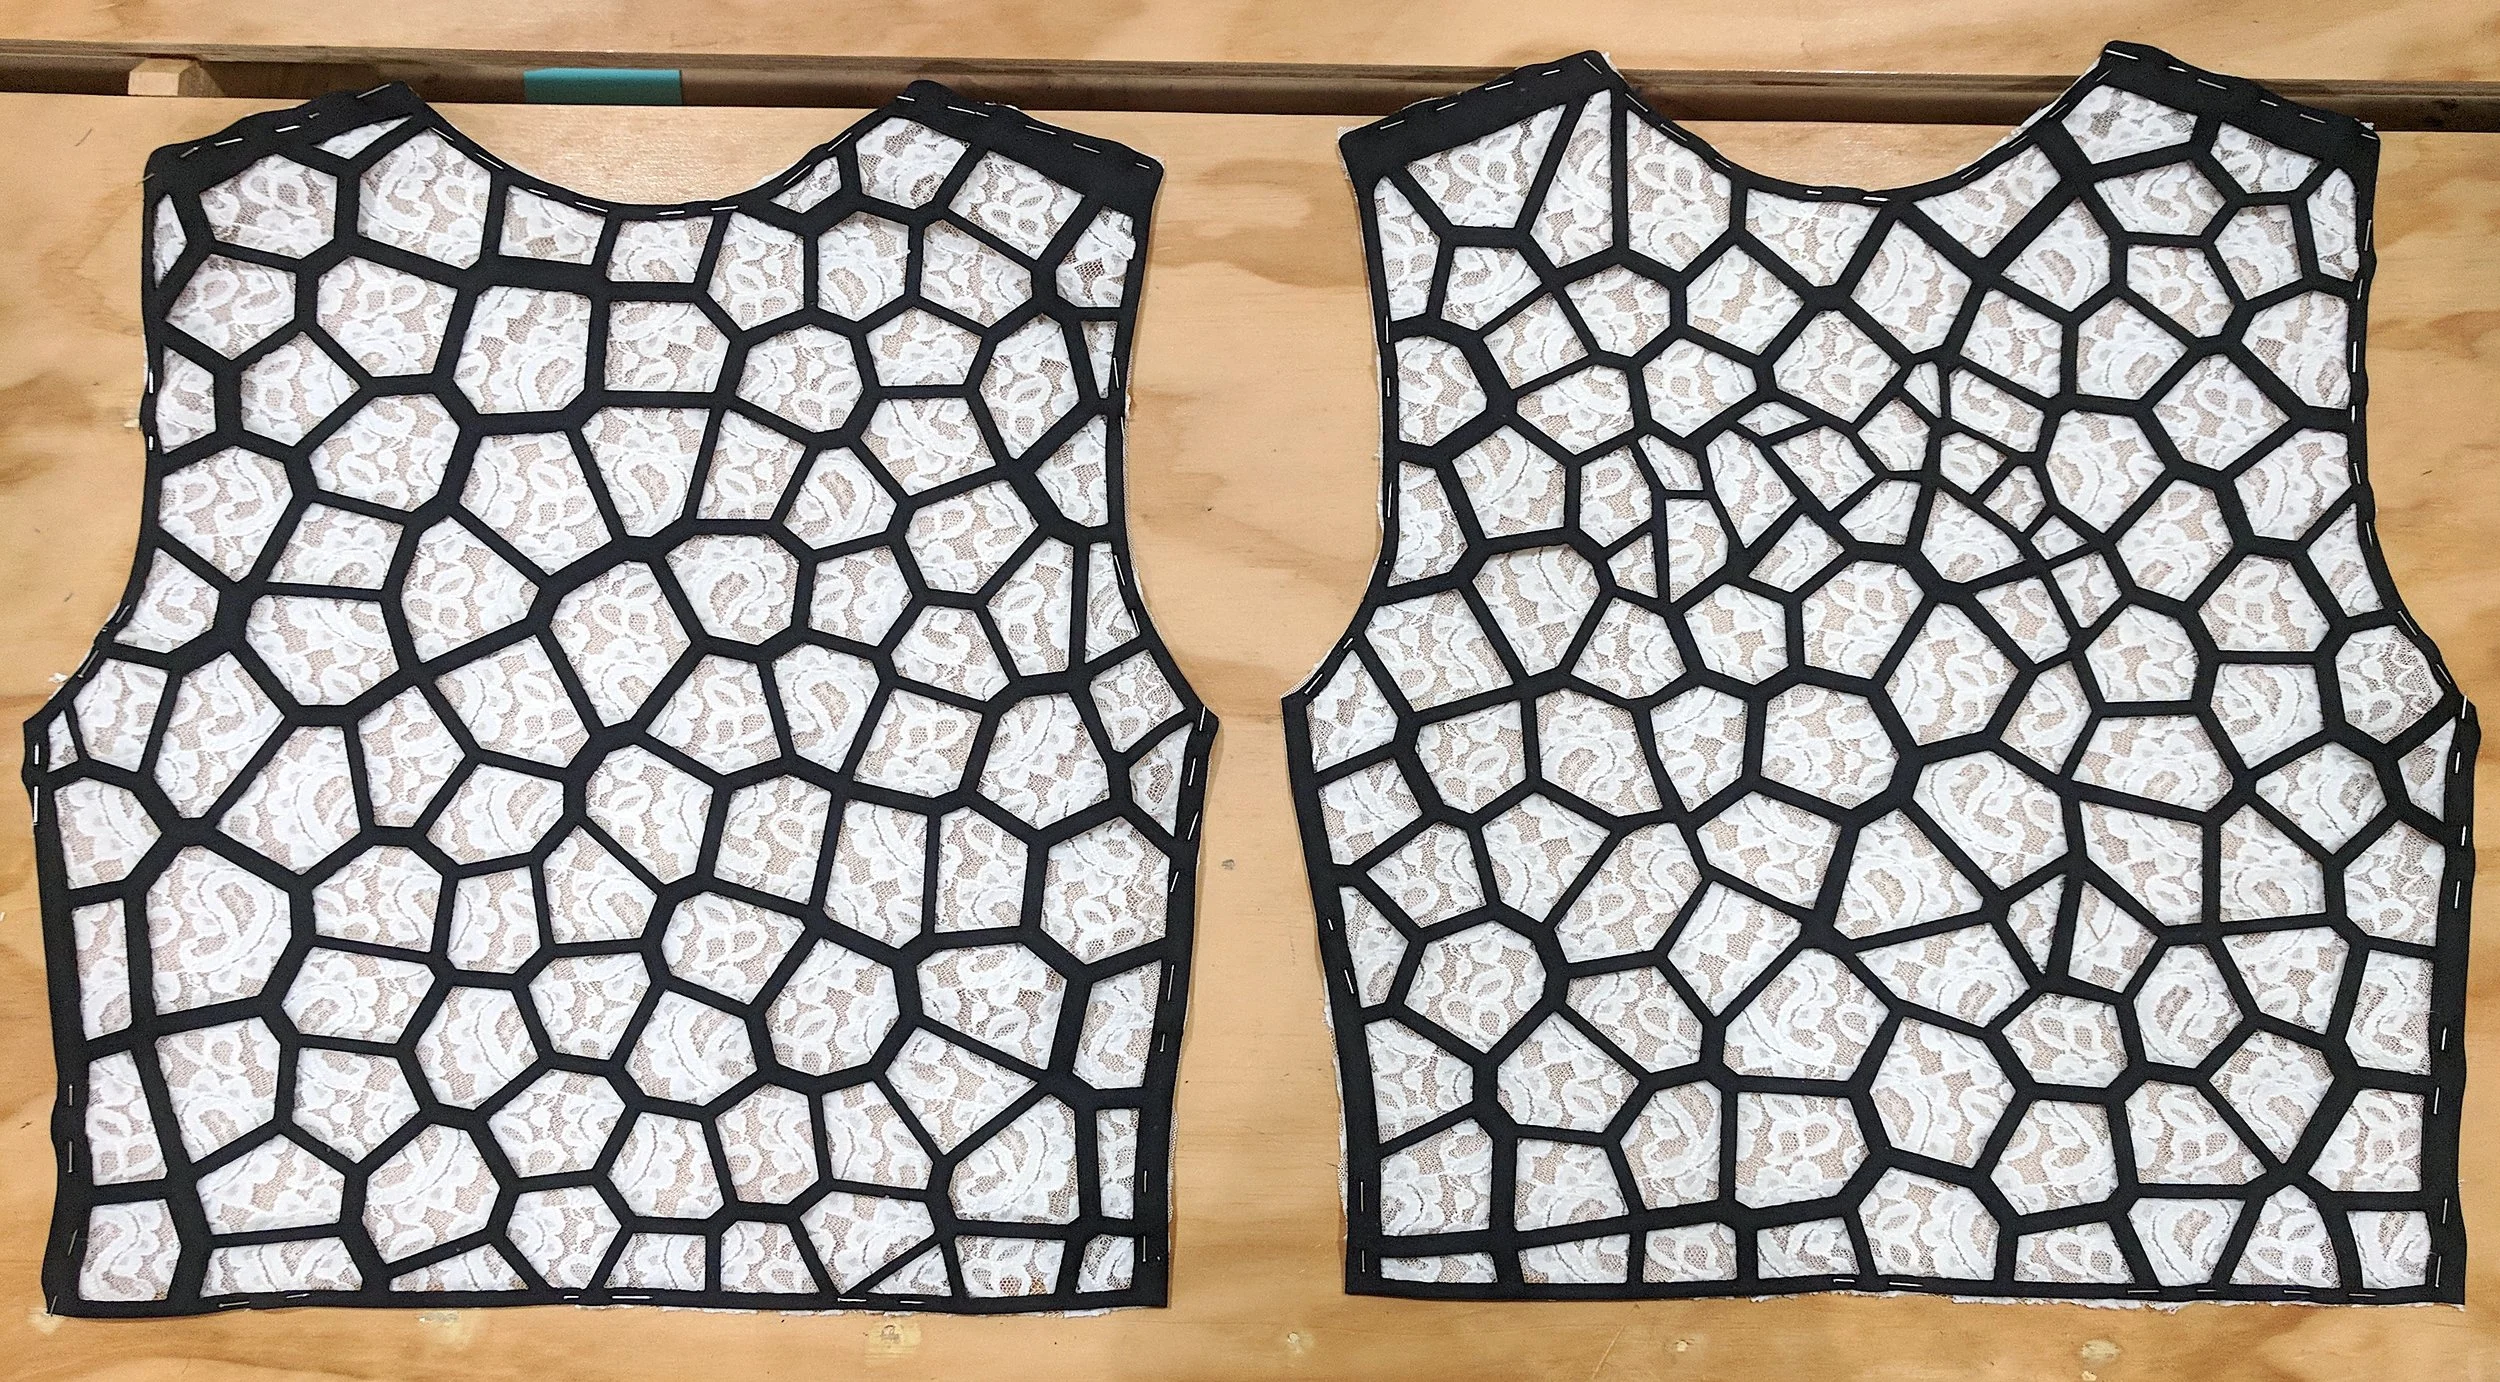
I went back on Rhino to complete the design of the top started in Sprint 1/Week 2. All I needed to do was fix the fit of the top to make sure that it could fit well. I had tried to create a voronoi heart shape, but wasn't able to fully master it, so I baked my Grasshopper definition and then worked to adapt the shapes in Rhinoceros by using control points.
Once I was done with the design, I exported my file to .dxf by using File > Export Selection > dxf and I placed it in the software for the laser cutter. I laser cut the voronoi pattern using the same settings from Week 12.
- Speed
- Power
- Duration 75 min
I would sew the top the following week.


RESULTS & REFLECTIONS
The result was quite nice and the process to make it pretty smooth. I want to learn more about the voronoi pattern so I can control it more effectively in Grasshopper next time.
EMBROIDERY
INGREDIENTS
- Friends
- Mayan Community
- Embroidery
PROCEDURE
During the last couple months I had tried to reach a community of mayan embroiderers so that we could make a heart embroidery together as a co-creative process, where I showed them the e-textile and computational design techniques, and they shared their knowledge on hand and machine embroidery techniques, both very popular in Yucatán. Due to a series of events, I hadn't been able to find any available community at the times I could join them, until I met two friends, one of whom started the Cooperativa Flor de Margarita, and the other who is an artisan and intermediary between designers and local artisans.


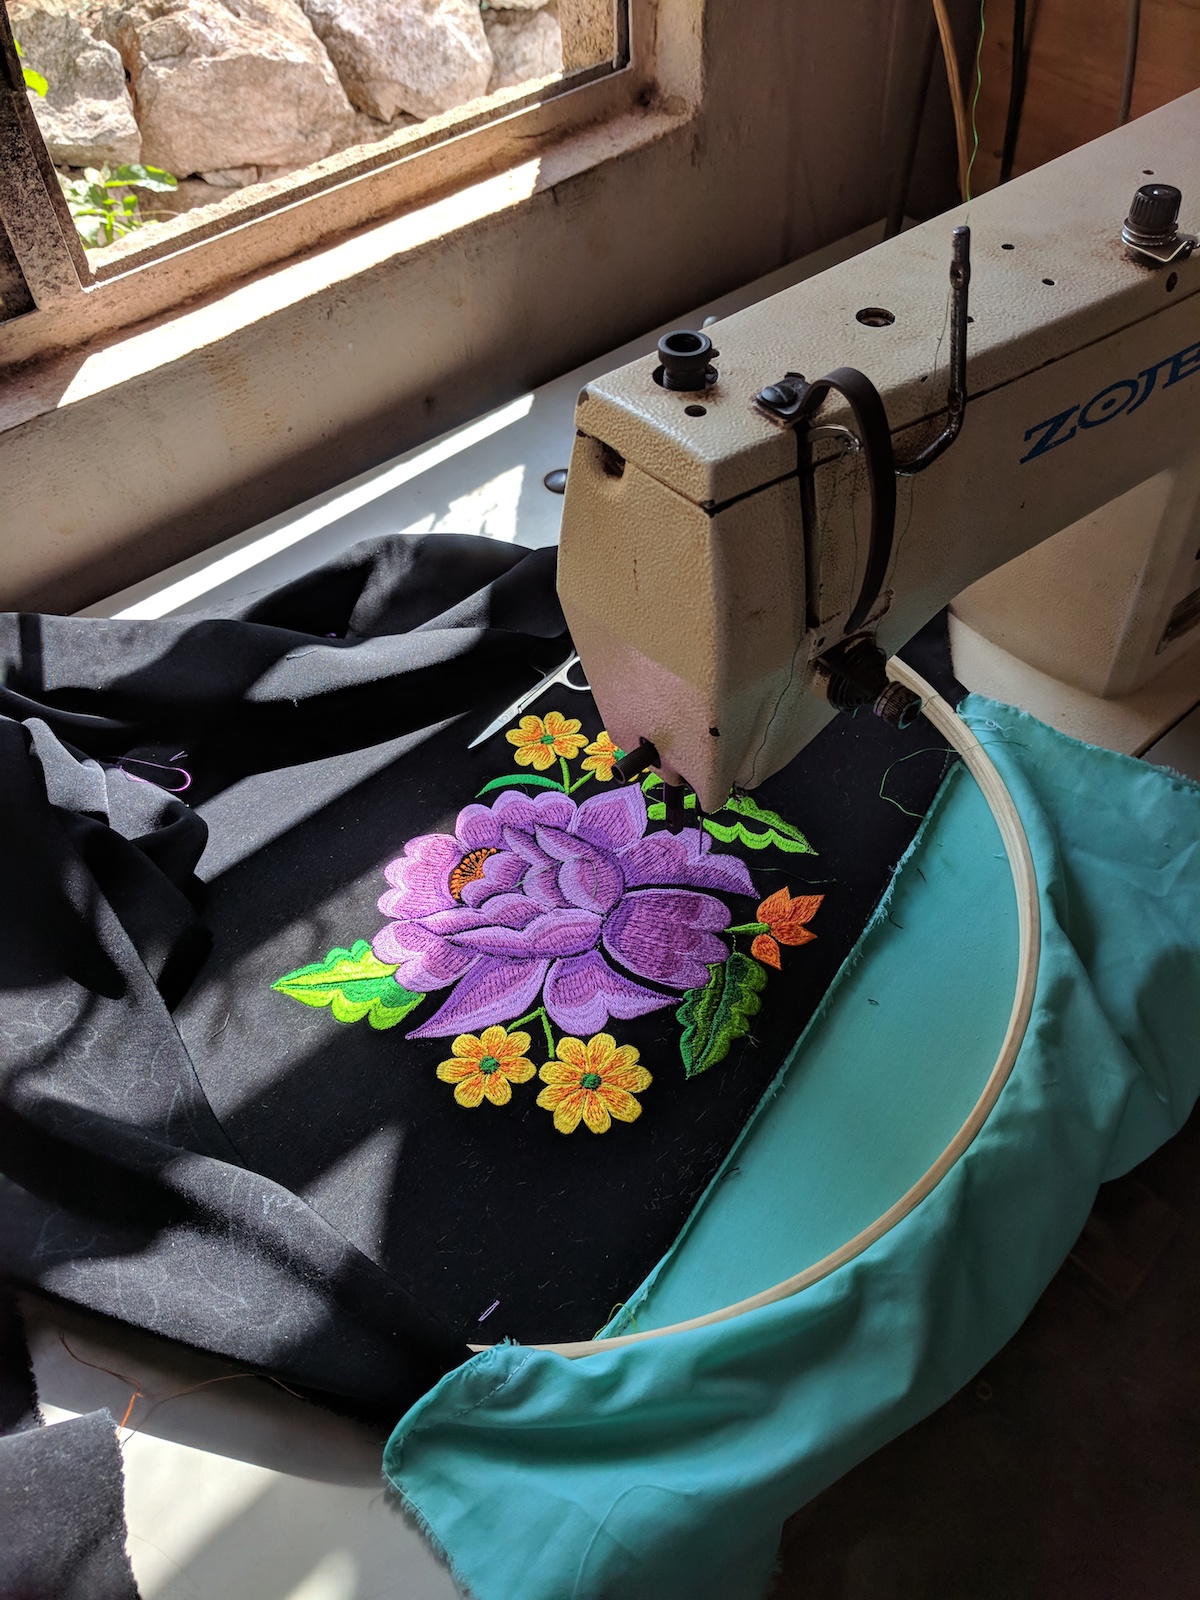
They brought me to visit their community and to join as a spectator a workshop they were receiving from a highly skilled woman from another pueblo on machine embroidery, so they could improve their skills. We went all the way to Yaxchachén, a few hours away from Merida, and spent the day facilitating the learning process of the community members in advanced embroidery techniques.
Needless to say the workshop was AMAZING! Doña Paula, the teacher, is extremely skilled and very patient with her students. The embroidery machine looked like the easiest tool in the world under her hands :) The students, mother, father and daughter part of the cooperative, were very diligent at observing her process and then trying it out themselves.
Even the father, who initially was skeptical, learned veery quickly and was very proud. The mother was a bit afraid of making mistakes, but in the end she got it and was very good.


RESULTS
This first contact with a Mayan community of embroiderers, facilitated by my two friends Margaret and Demetrio, was a really cool experience, and it made me understand a lot about the process of machine embroidery. Far from being human-free, even if aided by a machine this technique heavily relies on the embroiderer's mastery with the machine but also with the choice of colors, which are applied as if they were shades of paint one on top of the other.
Inspired by the experience, I decided to create a design based on the voronoi heart and to get one of the embroiderers to make it for me via machine embroidery, dipping my feet in what I desire to be a steady and fruitful collaboration with the community.